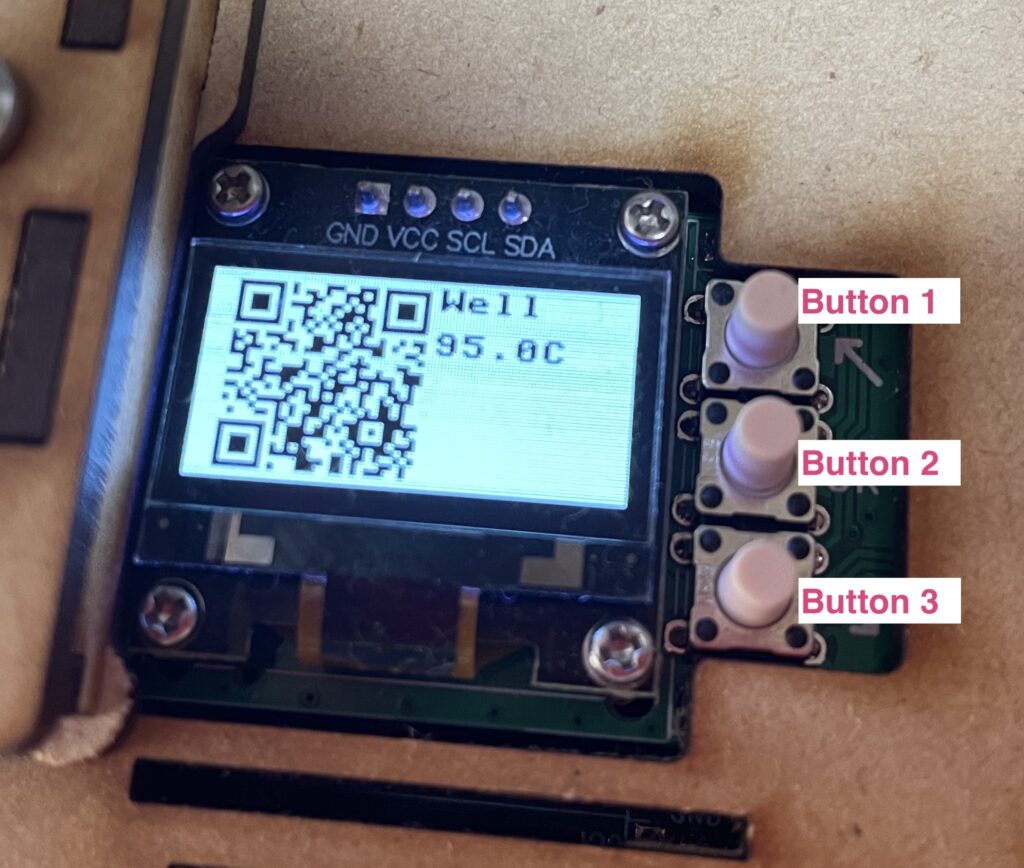

By tapping buttons while turning on the power, you can switch between modes. There is no power switch. Connect the cable of power adapter (2.1mm 12V 2A or more like this) to turn on and be patient for a while. It may take 15 seconds to turn on LCD screen. Just ignore QR code because it is a static link to q.hisa.dev. It will be replaced by software update in near future.
Normal Mode (Run as WiFi client)

If none of the buttons are pressed while turning on, the device starts in Normal Mode. If connection to any of the pre-registed WiFi access points is established as a client, hardware is ready to receive commands from the browser via cloud servers. Proceed to next step. If it failed to connect to WiFi, it automatically starts in the AP mode.
AP Mode (WiFi setup / Run as WiFi host)
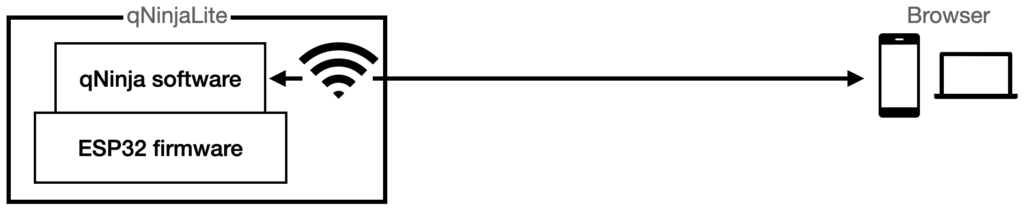
Hold top button1 while turning on the device to enter AP (Access point) Mode. The device itself becomes an WiFi access point with SSID qNinjaLite and show its IP address on LCD. Connect to the network from your phone/PC. By using WebREPL (browser console for MicroPython), you can configure WiFi settings for Normal Mode. AP mode is also useful in offline environments, such as during fieldwork. Proceed to next step.
Software Update Mode (Update qNinja software)
Hold middle button2 while turning on the device to enter Software Update Mode when you want to update the qNinjaLite software or login to WebREPL console. If connection to any of the pre-registed WiFi access points is established as a client, the device’s own IP address will be displayed on the LCD. Proceed to next step.
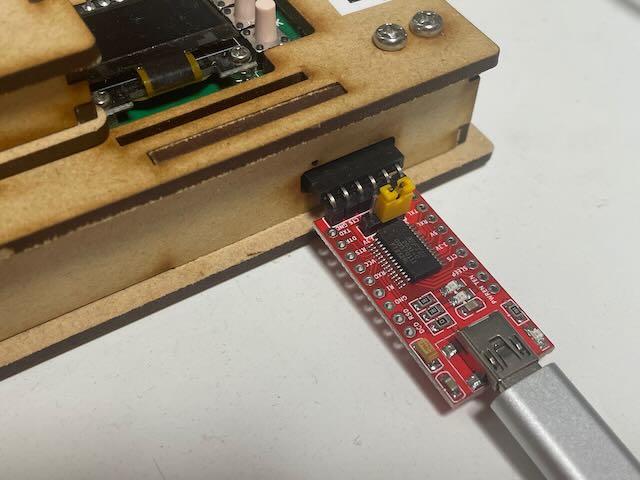
Bootloader Mode (Update ESP32 firmware)
qNinjaLite software runs on ESP32-WROOM-32 micro controller. Hold bottom button3 while turning on the device to enter Bootloader Mode. You can overwrite the firmware of ESP32 with 5V USB-serial adapter. Proceed to next step.
Related links
Bootloader – ESP32 – — ESP-IDF Programming Guide latest documentation
Getting started with MicroPython on the ESP32 — MicroPython latest documentation