To update WiFi settings of qNinjaLite, create a file named wifi_config.py and upload it to the root directory of the device with WebREPL interface.
Prepare wifi_config.py
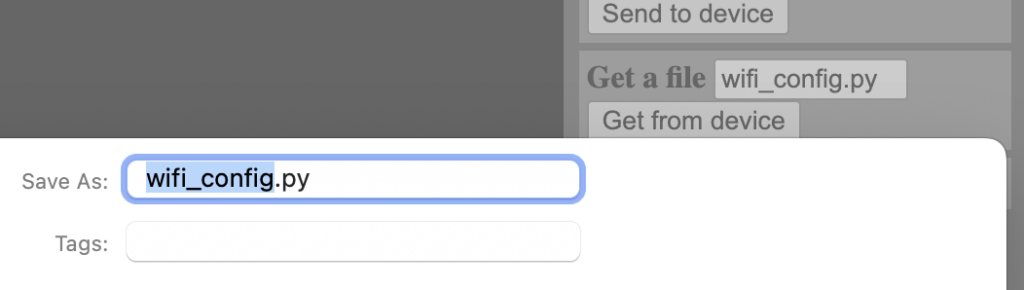
Launch any editor app you like. Copy and paste below example and change preferred_aps array to all of the WiFi networks you want to use your qNinjaLite in. The device will try to connect to the access point with strongest signal in the array. Save file as wifi_config.py then your file is ready. If you have not yet done initial setup of login tutorial, follow to bookmark webrepl.html.
preferred_aps = [
    ('SSID1', 'password1'),
    ('SSID2', 'password2'),
    ('SSID3, 'password3'),
    ('SSID4, 'password4')
]
network_state = {
    "wlan":{}
}
Launch in AP Mode
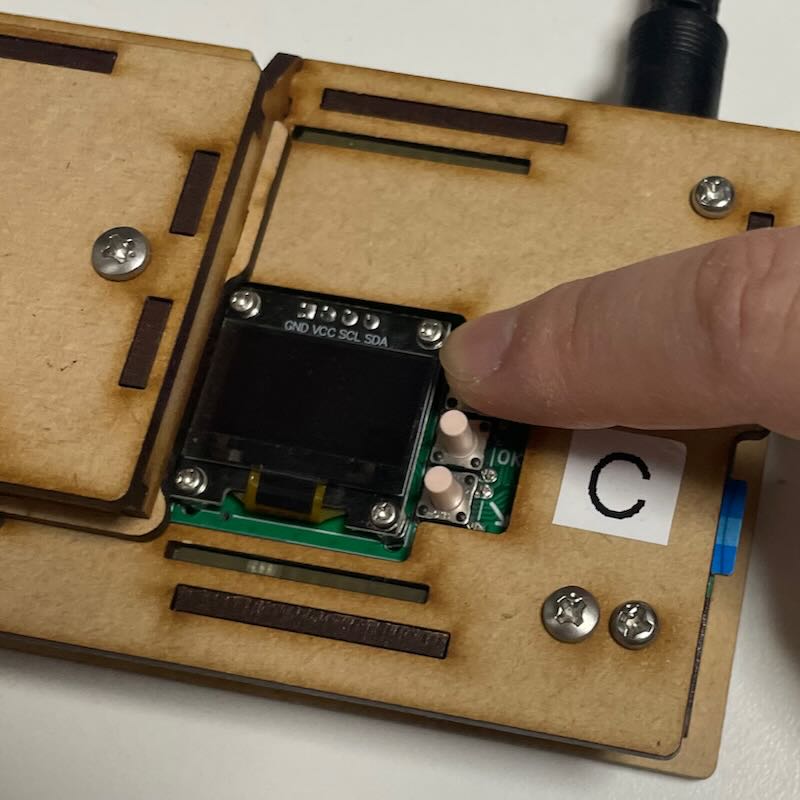
Hold top button1 while turning on the device to enter AP (Access point) Mode.
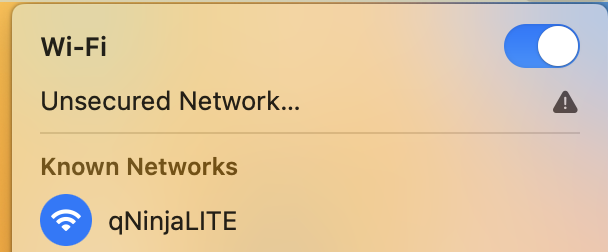
The device itself becomes an WiFi access point with SSID qNinjaLite and show its IP address (192.168.4.1) on LCD. Connect to the network from your phone/PC.

Upload wifi_config.py to qNinjaLite
First, login qNinjaLite by following this tutorial.
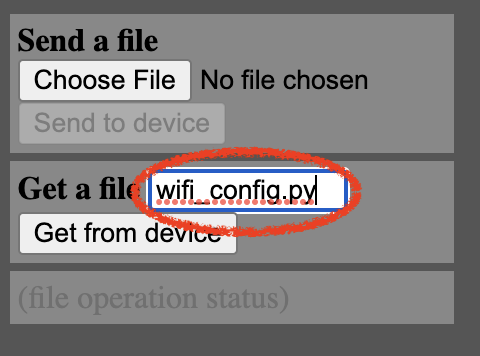
To check current WiFi settings, download wifi_config.py from the device.

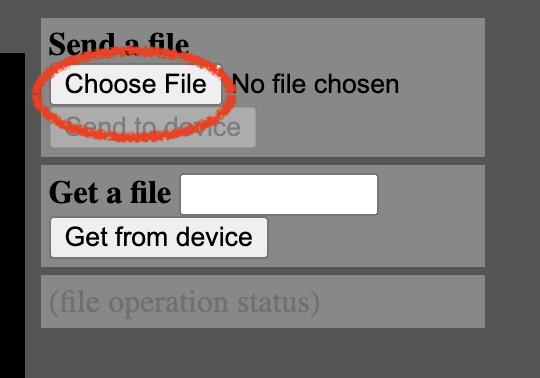
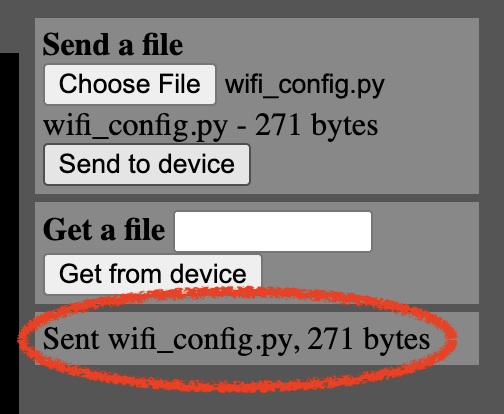
To update WiFi setting, click Choose File just below Send a file. Select wifi_config.py you have just made. Click Send to device button.

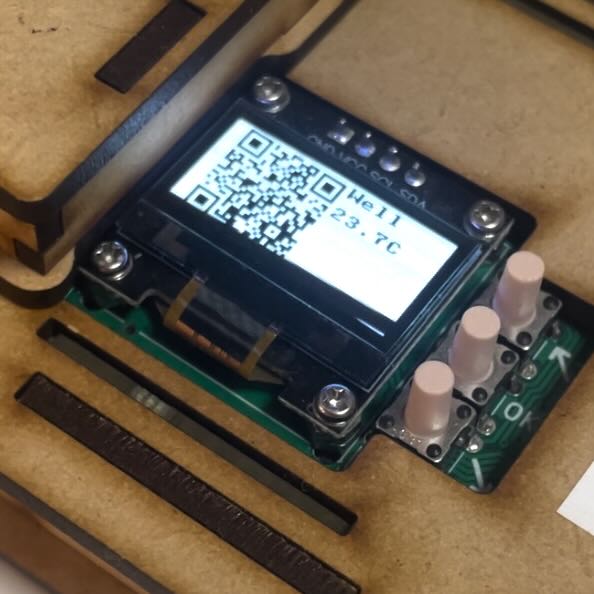
Turn off qNinjaLite and launch in Normal Mode without pressing any button while turning on. If it successfully connect to the WiFi network you added, it shows a QR code and current temperature. Otherwise it launches in AP Mode again.